When it comes to roof maintenance, many homeowners overlook drip edge flashing—a critical component that plays a significant role in protecting your roof and home from water damage. Properly installed drip edge flashing ensures water is channeled away from the roof, reducing the risk of leaks, rotting, and premature roof failure. In this detailed guide, we will explore everything you need to know about drip edge flashing, its types, benefits, installation process, and more.
What is Drip Edge Flashing?
Drip edge flashing is a metal strip installed along the edges of a roof to prevent water from seeping underneath the roofing material. Typically made from materials like aluminum, galvanized steel, or copper, the primary function of drip edge flashing is to direct water into the gutters and away from the underlying structures, such as the fascia and soffits.
Drip edges also help protect the edges of the roof from wind damage and increase the longevity of your roof by preventing moisture buildup, which can cause serious damage over time.

Why is Drip Edge Flashing Important?
Drip edge flashing is an essential roofing component for several reasons. Without it, the edges of your roof could become vulnerable to water intrusion, leading to expensive repairs. Let’s look at the primary benefits of drip edge flashing:
1. Protection from Water Damage
Water runoff can easily penetrate underneath shingles or roofing materials, leading to rotting of the roof deck, fascia, and soffits. Drip edge flashing ensures that water is redirected into the gutters, preventing any water from reaching these vulnerable parts of the roof.
2. Ice Dam Prevention
In colder climates, ice dams can form along the roof edge when melting snow refreezes. Drip edge flashing provides a channel for water to flow off the roof and into the gutters, reducing the risk of ice dams forming and preventing water from backing up underneath the shingles.
3. Protects Fascia and Soffits
The fascia and soffits are vital components of the roof structure. Drip edge flashing helps prevent water from seeping into these areas, where it could lead to rot, mold, and costly repairs.
4. Aesthetic Appeal
Drip edge flashing not only protects your home but also enhances its appearance. It provides a clean and professional finish along the edges of the roof, adding to your home’s curb appeal.
Types of Drip Edge Flashing
There are different types of drip edge flashing designed for various roof configurations. Let’s explore the most common ones:
1. L-Shape Drip Edge
The L-shape is the most common type of drip edge, typically used along the eaves (the edges of the roof). It has a right-angle design, with one leg resting on the roof deck and the other hanging down to direct water into the gutter system.

2. C-Shape Drip Edge
C-shape drip edge is often used along the rakes (the sloped edges of the roof). This design has a curved edge that ensures smooth water flow and is preferred for its aesthetic appeal.

3. Continuous Drip Edge
A continuous drip edge runs the full length of the roof and provides consistent water protection. This design is used in large buildings or when additional protection is necessary along the entire edge of the roof.

4. Tapered Drip Edge
Tapered drip edge gradually directs water away from the roof and prevents pooling. It’s an excellent option for roofs with complex drainage needs.

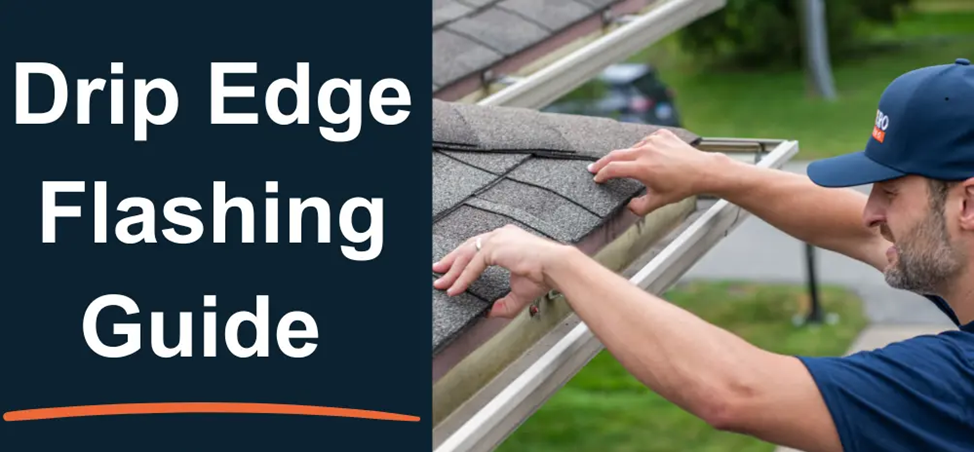
Drip Edge Flashing Installation Process
Proper installation of drip edge flashing is crucial for maximizing its effectiveness. While the installation process may vary depending on the type of roof, the general steps are as follows:
1. Preparation
Before installing the drip edge flashing, ensure that the roof is clean and free of debris. Remove any old flashing, roofing materials, or dirt that may interfere with the installation process. Make sure the edges of the roof are exposed so the flashing can be properly secured.
2. Measure and Cut the Flashing
Measure the length of the eaves and rakes where the drip edge will be installed. Use a metal cutter to trim the flashing to the appropriate length, ensuring the edges align with the roof’s edge.
3. Install the Drip Edge Flashing
Begin at the roof’s edge and work your way up. Place the drip edge flashing along the eaves first, ensuring that it overhangs the fascia board and extends into the gutter. Secure the flashing using roofing nails or screws, making sure it’s tightly affixed to prevent wind or water from dislodging it.
For rakes, the flashing should be installed in the same manner, ensuring the drip edge overlaps the eaves.
4. Seal the Edges
Once the drip edge is in place, seal the edges with a high-quality roofing sealant. This helps prevent water from infiltrating under the flashing and adds an extra layer of protection to the roof.
5. Install Roofing Material
After the drip edge is installed and secured, proceed with installing the roofing material (shingles, metal panels, etc.) on top. Make sure the first row of shingles overlaps the drip edge to further prevent water from getting under the roofing system.
Maintaining Drip Edge Flashing
To ensure your drip edge flashing continues to perform effectively, it’s essential to maintain it regularly. Here are a few tips for maintaining your drip edge:
1. Clean the Gutters
Regularly clean your gutters to prevent debris from accumulating and obstructing the flow of water. Clogged gutters can lead to water backing up behind the drip edge, causing potential roof damage.
2. Inspect for Damage
Periodically inspect the drip edge flashing for signs of wear and tear. Look for cracks, rust, or loose flashing that may need repair or replacement.
3. Check for Ice Dams
In colder climates, monitor for ice dams, as they can cause water to back up under the drip edge. If you notice ice dams forming, ensure the attic is properly ventilated to reduce heat buildup on the roof.
Materials Used to Make Roof Drip Edges
The material you choose for your drip edge flashing will impact its durability, appearance, and price. Below are the most common materials used:
1. Aluminum
Aluminum is one of the most popular and affordable materials for drip edges. It is lightweight, corrosion-resistant, and available in a range of colors. Aluminum drip edges are ideal for homeowners looking for cost-effective, long-lasting protection.
2. Galvanized Steel
Galvanized steel is a durable and sturdy option for drip edge flashing. Coated with a zinc layer, it resists rust and corrosion. It’s perfect for areas with harsh weather conditions or high winds.
3. Copper
Copper drip edge flashing offers the highest durability and aesthetic appeal. It’s highly resistant to corrosion, making it perfect for coastal areas. Copper develops a natural green patina over time, adding to its character. However, it’s the most expensive option.
4. Stainless Steel
Stainless steel is another premium option for drip edge flashing. It is resistant to rust and corrosion, and it offers superior protection in coastal or humid environments. Stainless steel is durable but can be more costly than aluminum or galvanized steel.
5. Zinc
Zinc is a durable material that’s resistant to corrosion and is perfect for areas with high humidity. While slightly more expensive than galvanized steel, it is still a budget-friendly option compared to copper.
Factors to Consider When Choosing Drip Edge Flashing
When selecting the right drip edge flashing for your roof, consider the following factors to make an informed decision:
1. Climate and Weather Conditions
Your region’s climate will play a significant role in determining the best material for your drip edge. Copper and stainless steel are excellent for coastal regions where rust and corrosion are concerns, while aluminum and galvanized steel are perfect for areas with moderate weather.
2. Roof Design and Aesthetics
The type of roof you have will determine the best drip edge flashing design. For example, C-shape flashing works well for sloped roofs, while L-shape flashing is ideal for eaves.
3. Durability and Maintenance
If you’re looking for long-term protection, opt for copper or stainless steel as they offer the highest durability and require minimal maintenance. If budget is a concern, aluminum or galvanized steel will still provide excellent protection.
4. Ease of Installation
Some materials are easier to install than others. Aluminum and galvanized steel are relatively easy to work with, while copper may require professional installation due to its malleability and cost.

What is the Cost of a Drip Edge?
The cost of installing drip edge flashing depends on several factors, including the material used, the size of the roof, and labor costs. On average, here’s a breakdown of the cost:
1. Material Costs:
- Aluminum: $1 to $2 per linear foot.
- Galvanized Steel: $2 to $4 per linear foot.
- Copper: $8 to $15 per linear foot.
- Stainless Steel: $5 to $8 per linear foot.
- Zinc: $4 to $7 per linear foot.
2. Labor Costs:
Labor costs for installing drip edge flashing typically range from $1.50 to $3 per linear foot. However, more complex installations could incur higher costs.
3. Total Cost Estimate:
For an average-sized home (about 2,000 square feet), the total cost of installing drip edge flashing can range from $500 to $2,500, depending on material choice and labor requirements.
Frequently Asked Questions (FAQs) about Drip Edge Flashing
1. Is Drip Edge Flashing Necessary?
Yes! Drip edge flashing is essential for preventing water damage and ensuring proper water flow off your roof. It protects your roof’s edges, fascia, and soffits from potential moisture-related issues.
2. How Often Should I Inspect My Drip Edge Flashing?
It’s recommended to inspect your drip edge flashing at least once a year or after significant storms. Look for signs of damage, rust, or loose flashing.
3. Can I Install Drip Edge Flashing Myself?
While it’s possible to install drip edge flashing yourself, it’s recommended to hire a professional roofer for the job. Proper installation is crucial for ensuring the flashing functions correctly and provides long-lasting protection.
4. What Happens If Drip Edge Flashing Is Not Installed?
If drip edge flashing is not installed, water can seep under the roofing material, leading to roof deck damage, mold growth, and fascia deterioration. It can also cause ice dams to form in colder climates.
Conclusion: Why Drip Edge Flashing is Essential for Your Roof
In conclusion, drip edge flashing is a small yet crucial element in your roofing system that protects your home from water damage, ice dams, and premature roof deterioration. Whether you opt for aluminum, galvanized steel, or copper, it’s an investment that pays off by prolonging the life of your roof and preventing costly repairs.
If you’re in need of professional installation or consultation, don’t hesitate to reach out to Sky Roofer for expert roofing services. Our team of professionals is ready to help you choose the best materials and ensure your roof is protected with high-quality drip edge flashing.

